Storage tank construction is a complex, precision-driven process that combines engineering design, safety compliance, and advanced welding techniques. This guide outlines each stage of the construction process — from preparing the site and welding procedures to the final pressure tests — with practical detail for engineers, contractors, and project managers.
Site Preparation and Foundation
Before any assembly begins, adequate space must be allocated for equipment, materials, and crew operations. This includes:
Layout and access pathways
Machinery and storage zones
Utility connections and safety installations
The first technical step in tank construction is laying the foundation, which ensures load distribution and structural stability. The base must support both vertical and lateral loads throughout the tank’s lifecycle.
Work Execution Plan (WEP)
Prepared by the engineering design organization, the Work Execution Plan guides all critical construction phases. It includes:
Stability procedures for structural components
Load-bearing requirements during erection
Safety and labor protection standards
Environmental compliance
Tank testing procedures and inspection scope
Welding standards are a key part of the WEP, outlining:
Materials and edge preparation
Heating protocols at weld junctions
Welding sequence and methods
Equipment specifications
Welding Techniques in Tank Construction
Electric arc welding is the primary technique used, including:
Submerged arc welding (automatic)
Manual arc welding
Mechanized arc welding with flux-cored wire
Weather conditions significantly affect weld quality. A shape coefficient between 1.3 and 2.0 is maintained for seam precision.
Tank Bottom Assembly
The bottom has two major components:
Segmental ring with the first shell ring
Central plate welded independently
Once both are installed, they’re joined to form a sealed base. Weld bands follow a back-step technique, starting from the center toward the edges.
A coiled bottom structure is placed on this surface:
Unrolled into position
Braced at the center with a welded rope loop for winching
Protected using a primer coat followed by two layers of bitumen with filler for corrosion resistance
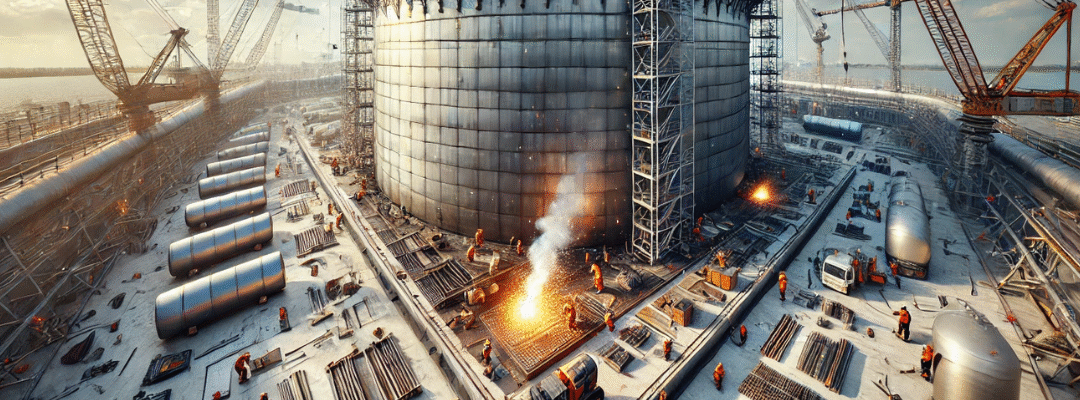
Tank Shell Installation
Shells are mounted either:
Plate-by-plate (ring by ring, from bottom up), or
By uncoiling pre-rolled panels vertically
Temporary stiffening rings are added to resist wind stress. All shell plates are precisely aligned and welded to maintain integrity and verticality.
Roof Installation and Floating Pontoon
Fixed Roof
For conical or spherical roofs, installation is done from above. If the roof includes decking and framework, it can also be assembled from within using central supports.
Temporary bracing is used to manage assembly load and prevent deformation.
Floating Roof (Pontoon)
The pontoon is a leak-proof floating roof, installed at the tank’s bottom before the rim seals are mounted.
Fittings and Manway Plates
Manway plates must be placed at least 100 mm from shell butt joints. Radiographic inspection ensures the joint integrity under these fittings, especially in covered areas.
Quality Control Measures
Quality assurance during tank construction includes:
Approved welding methods
Inspection of weld joints, especially intersections
Verification through technical supervision and documentation
Results are documented in compliance certificates and appended to the project file.
Final Hydraulic Testing
The concluding step is a hydraulic pressure test, ensuring:
Tightness of all weld seams
Structural durability under pressure
For tanks with floating roofs, testing is conducted before rim seals are added to maintain internal balance.